Saturday, August 8, 2015

Leeboard Gaurds

One of the things I've been sweating is getting a good fit on the leeboard guards and keeping them parallel to the centerline at the same time.  Turned out to not be so bad.  I screwed down some 1x2 with one end dead on the centerline marked on the bulkheads.  then I did the math to figure out where the outside edge of the top guard was going to be in relation to the side of the boat.  I had a couple of 8ft long trim pieces with the factory edge on the 1/2 " ply, so I clamped that down and squared it off to the centerline.


Then I did the math for a rectangular blank for the top guard, marked the pivot point on the boat and on the blank.  I also marked both ends of the guard on the boat.  I slid it up until it was kissing the boat at the high point and squared it off to the factory edge on the ply.  The I scripted the curve onto the ply.  Cut it with the little skill saw, and it only to a little work with the block plane and sandpaper to flush and square it up nice.


This was only a single 1/2" layer, so i used it for a template on another scrap piece and traced it.  Cut it out, spread the PL Premium carefully and clamped the bejeezus out of it.  Jim Specifies 1" thick ply.  Once I glue and screw it to the boat, I can fair up any errors by checking the alignment of the slot the same way before I cut it.  Then I'll use the inside edge of the slot to scribe the cut on the lower pivot guard to make sure they're dead parallel.

It was actually easy.


Thursday, August 6, 2015

Wales and Details

Well I've got my momentum back.

I finished off the Wales.  The boat was stout before, but now it feels like a little destroyer.  I'm considering painting it battleship gray and giving it a PT boat number.


The pressure from the sides and wales were actually starting to bow the top of the rear cabin bulkhead.  Jim has a sistering piece of 1x4 on the top of both these bulk heads that give the cabin front and back something to land on as well as strengthen the mast partner and the rear deck where your foot will land all the time getting in the boat.  I got those beveled and glued in as well.


I've owned a beach chair for quite a while that I though might make a good helm seat for this boat.  Had to try it out.  My head ends up at the perfect height.  This is going to be one comfy boat to sail.


Jim shows a tiller that extends into the cockpit past the rear cabin bulkhead.  This is run internally of course.  Sitting in the chair confirmed my suspicion that it will be well worth the effort to stop the till short of the bulkhead and install a Layden style steering loop in the cabin.  I'll have an extension I can slip into the tiller if needed.  The other thing I need to figure out is how to route/anchor the mainsheet in the cabin for this sitting position.

Once I get the pulley system installed for the loop steering, the dimensional lumber mast partner installed, and a Bow eye well anchored and reinforced, I can paint the end compartments and put the decks on.  I'm actually starting to see the finish line.

Saturday, August 1, 2015

She went to the store

OK,

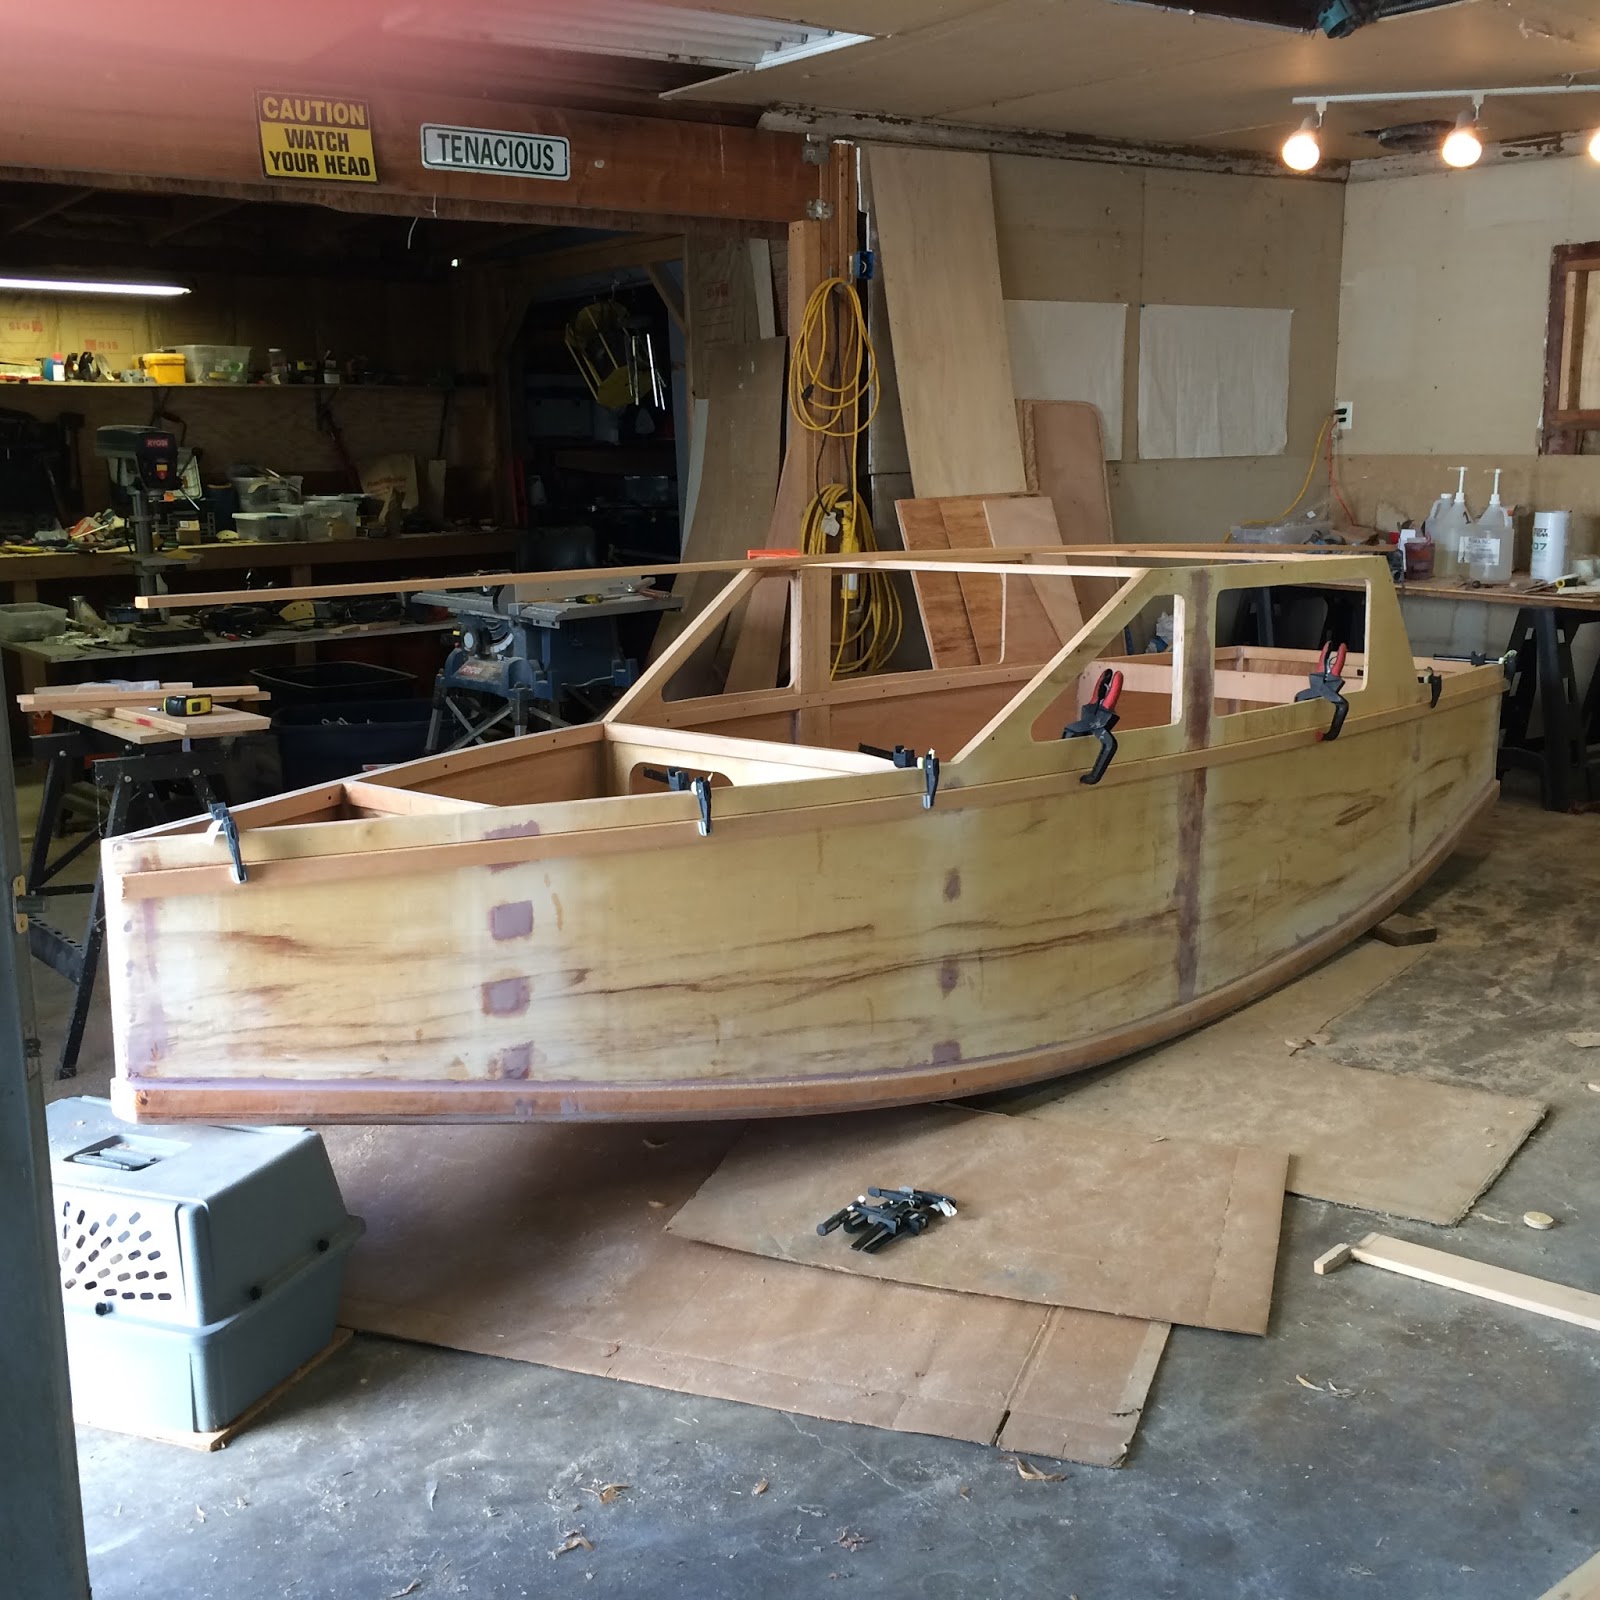
Snuck out and bent the first layer of wale on and traced it out to pre drill for fasteners from the inside.    Really starting to look like a boat.


Window cutting day

So I finally got the fillets and such sanded enough that I can get primer to stick when I paint the inside.  Started roughing the panels for the top of the boat, but knew I had to get the bashwales installed before I could paint inside and put those on.  Figured the time was ripe to cut out the window openings to help facilitate installing the wales.

I started by tracing @ 1" to the inside of all of the cabin framing.  I'm thinking I'm going to bolt and nut the windows on with Nylocks.  I also like the thought of leaving a bit of ply for structural strength.  The I got out the trusty hole saw and drilled my corners.


I connected the dots tangentially on the outside and broke out my little 4" skilsaw and cut from the outside.  Evened things up with the 7" Disc sander and the mouse sander.  Here's what she's looking like now.


It's really starting to look like the finished product.  I'd hammer in on getting the wales done this weekend, but tomorrow is the 1 year anniversary of meeting a very good woman that's still with me.  I need to spoil her for the rest of the weekend if I want to make it 2 years.  I think I do :-)


Thursday, July 30, 2015

Getting ready to cut out the windows

Got a little cabin framing done last night.

The one thing i really have to do before I can start laying on deck is mount the bash wales.  I need to be able to clamp/screw from the inside the whole length of the boat.  Once that's done, I can paint the inside of the fore and aft compartments and lay on the decks.  The I can finish off the cabin/wheelhouse.

I just want to get the cabin framed in enough to hold all of the curves when I cut the windows out.  Doing that first will help with the clamping and screwing for the bash wales along the cabin section.


Wednesday, July 29, 2015

Fillets and details

Used up a bunch more epoxy and 407 filler filleting all of the inside corners as well as the chines on the boat.  I need to learn a good mix for this.  Some ration of cabosil for sure.  I had a lot of sag and now it's a bit of a sanding nightmare.  Finally fund a good wire cone brush to put in my drill, and that's getting into the crannies pretty well to rough it all up for primer.  None of this is really structural, just looking for a good longterm seal to avoid moisture and dirt getting into the crannies to start rot.  Thank god I'm happy with a workboat finish.

I also got the rudder head laid out along with the pintles and gudgeons.  Cut the hole in the transom for the tiller.  made and installed the mast step.

I was going to tabernacle the mast.  Thought the better of it and just went with the simple original design.  Seeing as how I'm doing the slot top cabin with the "drop board" center window in front, It'll be plenty easy to step and unstep the mast from in the boat.

The 3 things I have left before starting to paint the interior are
Install the exterior "bash wales"
fabricate and install the leeboard guards
Install the cross framing for the cabin top and cut out the windows in the sides.

Not necessarily in that order.

God I'm sick of sanding already.  Even for a workboat finish there's a ton of it.

I'm also pretty sure that the next one is going to use no epoxy.


Sunday, July 12, 2015

Cool enough to work


Well we've been having the hottest June on record ever here in Portland OR.  Mid 90's almost every day, and just too freakin hot to spend too much time out in the shop.  We finally got a little cool down this weekend, and I got a few more things done.

Finished shaping the Lee board for one.


Then I got the rudder and rudder head laid out and laminated together.

Thanks to the warm day and the fast set on PL premium, I even got the rudder shaped up.

I got smart this time and clamped the work to the rack rail on my pickup in the driveway instead of doing it in the shop.  Admittedly I had to wash the truck when I was done, but it needed it anyway.  That was also MUCH easier than cleaning up all the dust thrown by the disc grinder inside. Hope my downwind neighbor had the door closed to the shop with all his shiny hotrods :-)

Feels good to get some more done.  I am enjoying sailing my pelican, but I just can't wait to get this boat on the water.