So no action here for a while. Sorry about that, I know how it is when I get to following a build and the information dries up suddenly.
I didn't want to turn the boat right side up until I had all of the bottom work done. This meant glass and paint. She's a pretty heavy little boat, and I didn't want to turtle her on the concrete once she was up to full weight with a bunch of the cabin sides cut out for windows.
The fiberglass is what slowed me down. I've always been pretty sensitive, and I was gonna need @ 1.5 gallons to get the bottom and chines done up. I got a killer deal on a 3 gallon RAKA kit from Andy Linn over at the Toledo boathouse. I met him at the Depot bay wooden boat show and picked it up. Very nice guy. Ac week or so later, I picked up the cloth and tape at TAP Plastics. All I needed was the time and inclination.
I should mention I spent a fair amount of time filling screw holes and rounding chines. I made the silly mistake of hitting some of the hole fills with the sander while the epoxy was still green and I didn't have any long sleeves on. Gave myself a nice rash on the forearm.
This weekend It finally struck me that I gotta just bite the bullet and get it done. I want to sail this boat this summer, and this is the one big holdup. So I jumped to it @ 3:00pm This Saturday. Spent 3-1/2 hours laying down the bottom cloth and chine tape with no help except Gracie in the house keeping the dogs out of my way. I laid and trimmed the cloth on dry, then squeegeed the resin in. I ended up just using my hands to smooth the chine tape on. Looking at the resin soaked palms on my nitrile gloves had me praying I wasn't going to be fighting another rash. It was the only good way to smooth it down tight on that vertical surface and form the overlap with the bottom cloth. Came out great. Went into the house pretty tired. Had some pork roast, beans and a couple of whiskeys on the rocks and passed out early.
Got up @ 8:00am and had breakfast and walked out to check the boat, hoping there resin would still be slightly tacky for a good chemical bond. Bone dry to the touch. Did such a good job with the squeegee that there were no white dry areas, but it had a texture like a cheese grater from the cloth. Panic email to the groups wondering If I was gonna have to sand, because that wasn't gonna work out to well without taking off a bunch of the cloth i just laid down. David G over at Harbor boat works suggested I check RAKA'S site for timetables on cure, but I should get on it ASAP.
I bypassed the website and dove out to get it done. Here's what she's looking like now.
Might have to do one more little weave fill this evening. Managed to keep it all off of me so far. No longer afraid of the process, so I'll probably be skim coating the rest of the boat. The stem and transom will get some cloth of course, but not the sides or the deck.
Sunday, May 31, 2015
Monday, March 30, 2015
2ND Layer of bottom on
I finally got around to putting down the 2nd layer of 1/2" ply on the bottom. I was going around about what kind of adhesive to use, and finally just decided to keep going with the PL Premium. Still too cool for epoxy unless I heat the shop or build some kind of conditioned tent around the hull. I'm going to be encapsulating the bottom and chines in epoxy anyway.
It went real well. A couple of hours with the hand planes got it all flushed up to the first layer and the chine logs. I'm ready to fill in all of the screw holes and glass the bottom and chines now.
I still have the temperature problem, so I figured I'd flip the boat and work on the interior, rudder, cabin top, hatch, mast step etc.... until it warms up, then flip it back. One good tilt with the bottom on and i reconsidered the idea. I'd flipped it over for the bottom work all by my self, but the bottom has CONSIDERABLY beefed up the weight. I'm a bit concerned about a future flip after even more added weight.
I think it's time to figure a way to warm the hull without warming the whole garage and order up the resin and glass for RAKA. glass the bottom and chines, paint the bottom and she never needs to flip again after i put her right side up.
I went back to trying to shape my leeboard in the meantime. I have a belt sander with some 80 grit, but i can't believe how slow it's taking the wood down. I get the sander hot enough to fry an egg with very little progress. The planes are kind of useless in this situation, which is too bad because they chew the material much faster than the sander. I've started shopping 7" disk sanders/angle grinders on Craigslist.
All in all everything's looking good and I'm really happy with how the build is coming together. In the end the boat pulled extremely straight with the bottom installation and no twist. I think the bow is @ 1/4" off being dead on centerline.
It went real well. A couple of hours with the hand planes got it all flushed up to the first layer and the chine logs. I'm ready to fill in all of the screw holes and glass the bottom and chines now.
I still have the temperature problem, so I figured I'd flip the boat and work on the interior, rudder, cabin top, hatch, mast step etc.... until it warms up, then flip it back. One good tilt with the bottom on and i reconsidered the idea. I'd flipped it over for the bottom work all by my self, but the bottom has CONSIDERABLY beefed up the weight. I'm a bit concerned about a future flip after even more added weight.
I think it's time to figure a way to warm the hull without warming the whole garage and order up the resin and glass for RAKA. glass the bottom and chines, paint the bottom and she never needs to flip again after i put her right side up.
I went back to trying to shape my leeboard in the meantime. I have a belt sander with some 80 grit, but i can't believe how slow it's taking the wood down. I get the sander hot enough to fry an egg with very little progress. The planes are kind of useless in this situation, which is too bad because they chew the material much faster than the sander. I've started shopping 7" disk sanders/angle grinders on Craigslist.
All in all everything's looking good and I'm really happy with how the build is coming together. In the end the boat pulled extremely straight with the bottom installation and no twist. I think the bow is @ 1/4" off being dead on centerline.
Tuesday, March 10, 2015
First layer of bottom on
So I got the chine logs all glued up and a bunch of planing done to bring everything square and fare. Got the First layer of 1/2" on and pulled the boat into square with it. I was pretty worried that I'd gotten the thing somehow badly distorted, but it all came into line nicely.
I gotta say I was shopping routers to trim that bottom off flush to the chines. Truth be told though, i spent some time sharpening up the pile of planes i bought at at a garage sale @ 1.5 years ago, and it was actually kind of a pleasure to take it down with those. Found some new muscles in my shoulders, but they really did a nice job.
3 more sheets of ply and I'll have the second layer of bottom on and all of the decking and hatches. It's time to order up some fiberglass and resin from RAKA. I really need to fill all of the screw head holes and such on the first layer before i nail the second one down. I also think the resin with the adhesive filler is going to be the best laminating glue for me. I could do it with the PL Premium, but the stuff is pretty viscous and it would be tough to get that much area even and flat and then have the ply lay down tight.
I'm wondering if I should flip her and work on the interior while i wait for it to get here or just leave it bottom up until I have the bottom done and glassed along with the chines, maybe even the paint on it. be nice to have the bottom at full strength before i go playing on the inside.
I gotta say I was shopping routers to trim that bottom off flush to the chines. Truth be told though, i spent some time sharpening up the pile of planes i bought at at a garage sale @ 1.5 years ago, and it was actually kind of a pleasure to take it down with those. Found some new muscles in my shoulders, but they really did a nice job.
3 more sheets of ply and I'll have the second layer of bottom on and all of the decking and hatches. It's time to order up some fiberglass and resin from RAKA. I really need to fill all of the screw head holes and such on the first layer before i nail the second one down. I also think the resin with the adhesive filler is going to be the best laminating glue for me. I could do it with the PL Premium, but the stuff is pretty viscous and it would be tough to get that much area even and flat and then have the ply lay down tight.
I'm wondering if I should flip her and work on the interior while i wait for it to get here or just leave it bottom up until I have the bottom done and glassed along with the chines, maybe even the paint on it. be nice to have the bottom at full strength before i go playing on the inside.
really starting to look like a boat.
All by plane with just a light pass with the mouse sander
just a few passes with the plane and this joint is nice and level. There was a small peak in spots from nailing the two halves on separately.
All flushed up and ready to trace the next layer of ply.
Wednesday, February 25, 2015
CHINE LOGS CLAMPED UP
Stopped by Harbor Freight and picked up 10 more clamps. clamped up both side together stem to stern, and all is good. I'll leave them like this until the weekend when I have time to carefully glue and screw. Maybe they'll take the set in that time to make that process a bit easier.
I was sweating this part, but it's all going to be good. I'm really happy I made the change to go external on these. I can't see any downside to the decision. might even help me going to windward on a close reach in shallow water where the board is up.
Tuesday, February 24, 2015
CABIN FRAMING AND FLIP:30
So a bit sidetracked again, but finally got to some more progress.
I took a time out to straighten the boat out a bit. i had notices the offset stem, but later realized there was more wrong. I split the stem down the middle and cut off the transom. I took a square piece of ply and locked the major bulkheads 5 & 12 into proper alignment, then glued the stem back together and installed a freshly fabricated transom. That's # 3 for anybody counting :-)
Once back to where I though I already was, I thought I'd properly lubricate the mental machinery for framing out the cabin sides. i wanted to get this done before flip ply the boat to give more structural support. the cabin top is going to be my sawhorse for the bottom work.
I took a time out to straighten the boat out a bit. i had notices the offset stem, but later realized there was more wrong. I split the stem down the middle and cut off the transom. I took a square piece of ply and locked the major bulkheads 5 & 12 into proper alignment, then glued the stem back together and installed a freshly fabricated transom. That's # 3 for anybody counting :-)
Once back to where I though I already was, I thought I'd properly lubricate the mental machinery for framing out the cabin sides. i wanted to get this done before flip ply the boat to give more structural support. the cabin top is going to be my sawhorse for the bottom work.
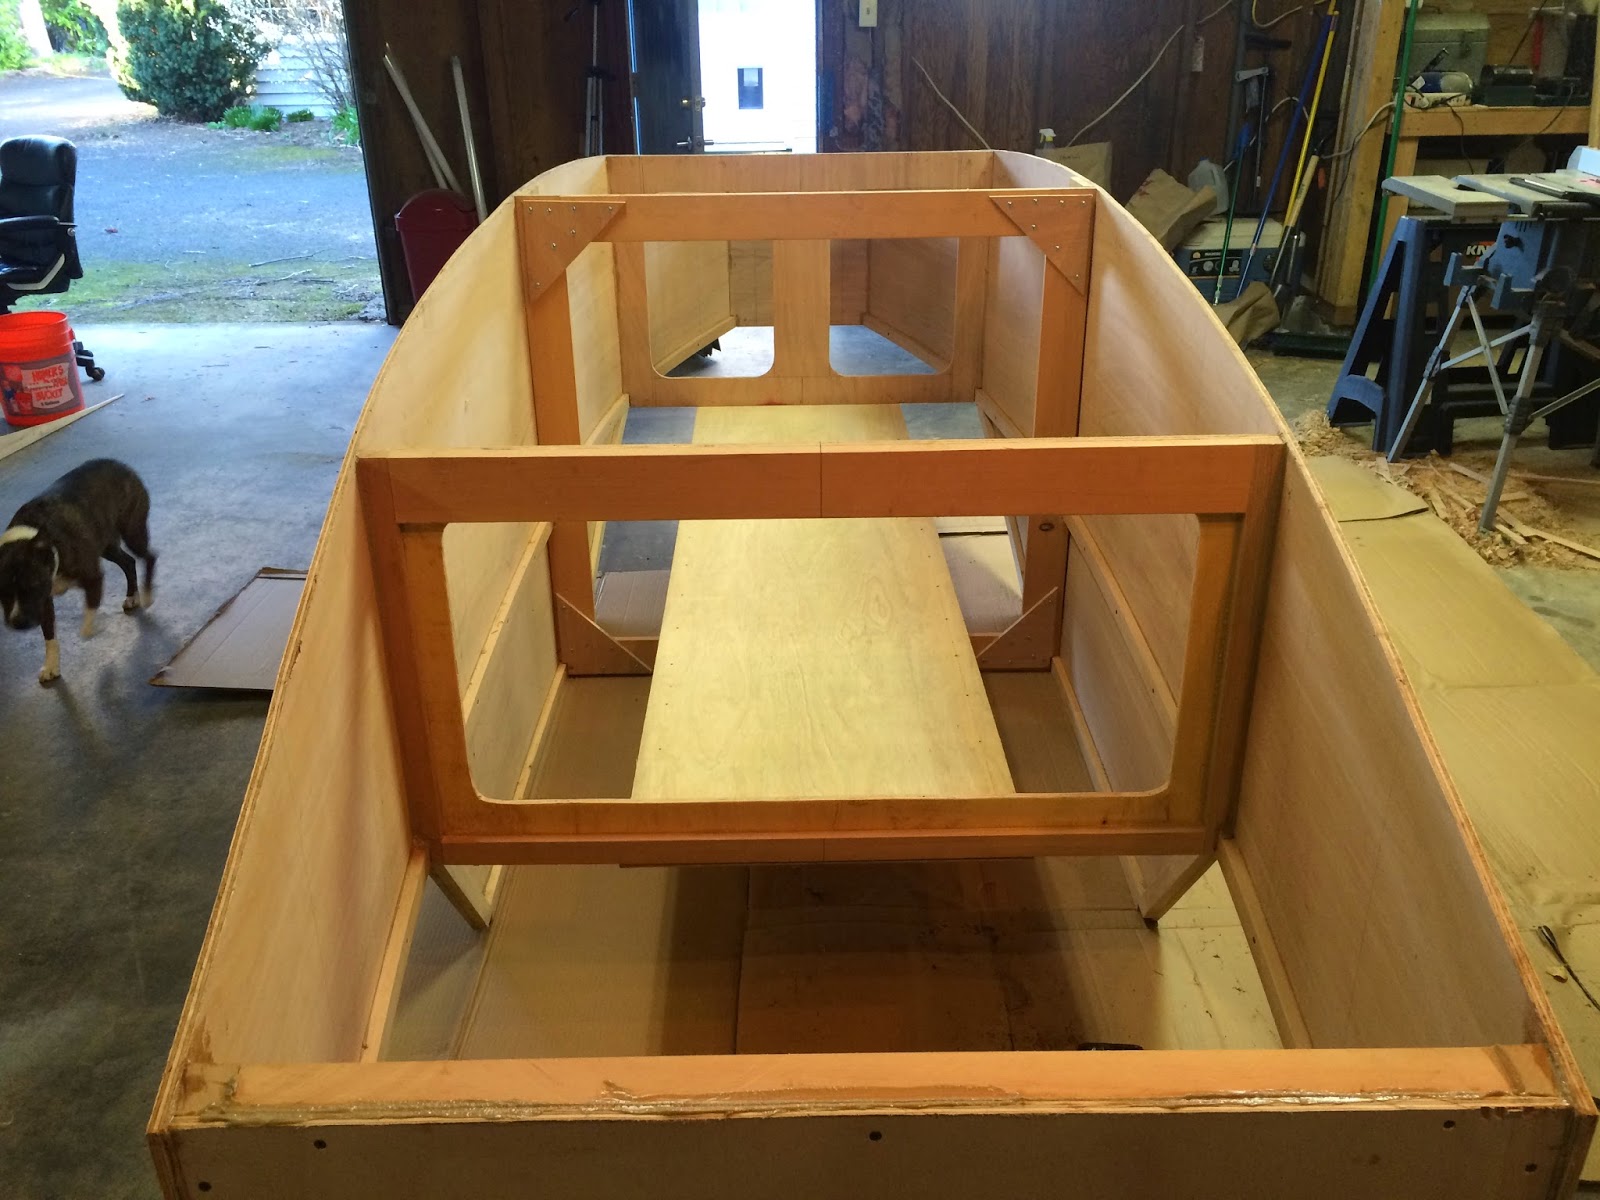
Here's a few shots of how the framing came out.
Once the glue set for a couple of days, i went ahead and flipped the boat. i was able to do this by myself with no help. I figured if the bulkheads couldn't hold yup to me doing this with no help, i didn't make the connections strong enough and i'd rather find out now. Absolutely no problem though.
The boat is very stable and at a nice working height just sitting on the cabin top. I can see that I have some fairing and filling to do on the bottoms of the bulkheads to bring the flush to the bottom. I've considered just slathering in some epoxy fillets/fillers after i get the bottom on and flip it back, but i really want to be able to nail the bottom to the bulkheads as I install it. I'm getting awful good with my little block plane on this job. I took the time to sharpen her up proper, and it works just fantastic. might be my new favorite tool. If I would have known how fast and well it was going to work, i would have left a lot of things a lot more proud instead of trying to finesse the cuts and measurements so much. another thing learned.
I did some test fitting of one of the chine logs. It looks like all of the prestressing with the water bucket and sawhorses left enough memory that this isn't going to be a problem. I can tell right now I have to go buy more clamps though. I want to work down both sides together as i've heard that doing one side complete before moving over to the other is a good way to pull your boat out of whack.
I've got a busy weekend coming up, so it looks like I'm @ 1.5 weeks out for having the bottom on. I'm thinking I should get the glass on the chines and bottom and paint on the bottom as well, then I won't have to flip the boat anymore after setting it back upright. I'll probably roll it 90 degrees to glass each side, but a full 180 will no longer be required. It's going to be a lot heavier with that 1" of ply on the bottom.
Sunday, February 15, 2015
Stuck together for good and decisions to be made.
During last week I made a new transom. This time i cut the bevels on the timber before screwing and gluing to the plywood like Jim suggests in his book, and it all went much nicer. I also cut the notches in everything for the interior wale. I'd considered bringing this to the outside like the chine log, but it caused a number of other issues so I left it inside. I glued and screwed those to the sides, and cut out all of the openings in the interior bulkheads.
Saturday afternoon I had a 1 hour window where my neighbor and his buddy could come by and help hold things as I glued and screwed it all together for good. It was much harder benign the sides in accurately with that wale in place. I can just imagine if I had the internal chine lots to deal with as well. Mechanical advantage would have definitely been necessary.
That might have been a blessing in disguise. I could have carefully checked all alignments as I slowly cranked everything in. As it was, it was 3 guys grunting until "It's GOOD! Shoot the screw!!!" Still, everything hit the lines and sighting down the boat all of the bulkheads were parallel, so no twist.
This morning i got up, had breakfast, walked the dog and opened up the garage to take a good look at everything again. Chopped off the spare stem above the wales and boat sides for a better sight line. took the block planes and shaved the sides down flush with the wales. Got down on one knee and took a good hard look. Everything still parallel, Wonderful! Uh oh....centerlines don't quite match up. 1/2 an hour of running the tape measure this way and that, and the verdict was in. all of the bulkheads and the transom were parallel. The stem is somehow @ 3/4" to port off centerline. Now I could just delete this whole part of the blog, and no one would ever know but me. Functionally, I might have a slightly faster boat on one tack than the other, but i doubt it will ever be noticeable. Good news is the extra curvature is on the same side as the outboard mount is going to be, so maybe the combined asymmetry will make it motor straighter? I think I'll just tell myself that. It's not enough to make me chisel things apart and start over. It's my first build, I'm using ACX Ply and PL premium. It's supposed to be a learning experience.
Saturday afternoon I had a 1 hour window where my neighbor and his buddy could come by and help hold things as I glued and screwed it all together for good. It was much harder benign the sides in accurately with that wale in place. I can just imagine if I had the internal chine lots to deal with as well. Mechanical advantage would have definitely been necessary.
That might have been a blessing in disguise. I could have carefully checked all alignments as I slowly cranked everything in. As it was, it was 3 guys grunting until "It's GOOD! Shoot the screw!!!" Still, everything hit the lines and sighting down the boat all of the bulkheads were parallel, so no twist.
This morning i got up, had breakfast, walked the dog and opened up the garage to take a good look at everything again. Chopped off the spare stem above the wales and boat sides for a better sight line. took the block planes and shaved the sides down flush with the wales. Got down on one knee and took a good hard look. Everything still parallel, Wonderful! Uh oh....centerlines don't quite match up. 1/2 an hour of running the tape measure this way and that, and the verdict was in. all of the bulkheads and the transom were parallel. The stem is somehow @ 3/4" to port off centerline. Now I could just delete this whole part of the blog, and no one would ever know but me. Functionally, I might have a slightly faster boat on one tack than the other, but i doubt it will ever be noticeable. Good news is the extra curvature is on the same side as the outboard mount is going to be, so maybe the combined asymmetry will make it motor straighter? I think I'll just tell myself that. It's not enough to make me chisel things apart and start over. It's my first build, I'm using ACX Ply and PL premium. It's supposed to be a learning experience.
I was asked in an email if I'd considered how to power the boat with an outboard. The following was my response.
Graeme,
Thanks :-)
Yeah, that’s kind of my mental picture of sailing the boat too. Especially after watching all the Youtube of Sean Mulligan’s Paradox videos down on Havasu. In Jim’s original design brief he talked about how the sail was probably too big, and I’m seriously considering reducing the area. I’l be sailing mostly on the Columbia River here in the PNW, and the topography gets the wind really howling a lot of days. It essentially runs through a gorge from desert on the interior to the sea. on a hot day, all that rock heats up sucking the wind in from the ocean. One of the premiere windsurfing spots in the world is just 40-50 miles east of me at Hood River. I wrote Jim and he thought @ 100ft2 would be appropriate. I did a little research on paradox, and low and behold that nifty roller furling lug is right about 100ft2. I’d love to be able to shorten the mast 2ft anyway. It’s designed at 18ft, which requires scarfing. I can find some pretty decent 16ft stock around here to glue up a mast from all day. Lowering the effort would allow a little less permanent ballast helping the trailer weight.
I own a Potter 15 that has a main that’s only @ 65ft2. Me , the girlfriend and the dog were out on a pretty mild wind day and moving just great under main alone, never even bothered to hoist the jib. It’s the Potter that got me interested in the Robbsboat. I got tired of having the centerboard trunk ruin the cabin in about 2 days flat. I then realized that if the boat got swamped as high as the centerboard trunk, it was game over trying to get it bailed out. The time it takes to rig the mast and sloop rig with the stays is irritating after my time spent with unstayed cat rigs on my little marbles trimaran. Even the junk rig i built for the tri is a lot less hassle. Lastly, one of the big discussions on Potters is how to get enough weight in the from of the boat because your weight is so far back in the cockpit. Robbsboat cures ALL of these problems. I almost forgot, it rains a lot around here, nice to be able to steer from a pilothouse :-)
Auxiliary power is big on my mind. There’s usually @ 1.5 knots of current to deal with on the river. Power is a necessity to make it home by Sunday night to make it to work on Monday. I own a sweet little 2-straoke 2hp evinrude that a child can pick up. Holds enough fuel to run about an hour though, and i don’t want to just strap gas cans on deck. No way am I going to store fuel inside the boat. I’ve been designing a fuel locker to go midships in front of the rudder. It will drain out the transom and have a cover strong enough to stand on. That way I can store gas and propane safely, hidden and out of the weather. Still gotta do the stupid scissor bracket for the motor (Trust me, i though long and hard about a good transom cutout). Jim designed a tiller that just comes through a cutout in the transom and protrudes slightly past the aft cabin bulkhead. Due to the dimensions of the boat, it was going to have @ 30 degrees of sweep each side max. Plenty for actual sailing. My fuel locker forces me into a “T” head on the rudder and a rope linkage. Easiest thing is to just go to a wheel and drum and run the rope linkage through the fuel locker. If I run the locker all the way to the cabin bulkhead, I can mount the wheel on the cabin side, super short shaft into the fuel locker and the drum immediately abaft the bulkhead. entire system easily accessible for inspection/maintenance/repair, and i just eliminated a major path for water into the boat. I’d much prefer tiller steering, but this solves all of the problems. The last issue is no good way to run a rudder downhaul, but I’ll probably just change over to a Mik Storer cassette rudder and call it a day. No lead to pour that way either. The transom is only 3ft behind the aft hatch, so both the rudder and the motor will be easily accessible without even getting my bottom half out of the cabin.
I forgot to mention that it’s pretty necessary that i keep this locker midships. I don’t want to lose the buoyancy at the sides for the knockdowns. If I keep it no wider than 12”, It’s narrower than the hatch, so no loss at all unless I were to turn complete turtle. Otherwise I could just offset the rudder, and mount the motor at the aft end of the fuel locker in a transom notch. I’d still end up needing rope steering.
Reducing the sail area might allow me to shorten the boom enough that I keep the sheet clear of the motor as well. I haven’t played with the CLR yet, but knocking the bottom 2ft off the sail Jim designed gets the mast length where I want it and makes it look a lot like the mayfly sail. If i go to a standing lug like Paradox, that also helps allow me to shorten the boom and keep the balance. I’d love to keep a balance lug though for the self vanging and to make Chuck Leinweber’s lazyjacks and jackstays work on the boat.
I should probably copy and paste this whole thing to the blog :-)
Tom
All of that being said, as i look at the rear of the boat and see just how simple it would be to build it to plan, I begging to wonder just how bad stopping a 3-gallon tank to the aft deck would be. All of the extra framing and rudder linkage would be a pain in the butt, and i want to sail the boat this spring/summer.
As Jim has it designed, I make a small hole just under the framing timber through the transom for a straight tiller that protrudes into the cabin a bit. I can run my up haul. a down haul if i don't want to pour lead and maybe even my mainsheet along the tiller. I've got good enough access from beneath in the cabin that I can always make the change later if the fuel up on top bugs me too much.
Last thing I'm playing with is a tabernacle design. going forward on this boat is going to be something that's not easy to do. Some of the back sloughs that this boat is going to be so good for exploring have a lot of trees. One of my favorite ramps has a big tree that prohibits launching right along the dock if you have a mast raised. I love the thought of being able to raise or lower the mast with a yank on a rope in the cabin. This would also alleviate any leakage in the foredeck from the mast penetration. This I'm going to do for sure. That's why I left the meat in the ply on the forward bulkhead. Tabernacle will be anchored all along it.
Next project is to get some more 1x2 and frame up the cabin sides for a little more support before i flip the boat to put the bottom on. I should be ready for the flip in a few days, then next weekend will be bending those chines on. weekend after that should be the first layer of bottom.
Good times :-)
Saturday, February 7, 2015
3D DAY!
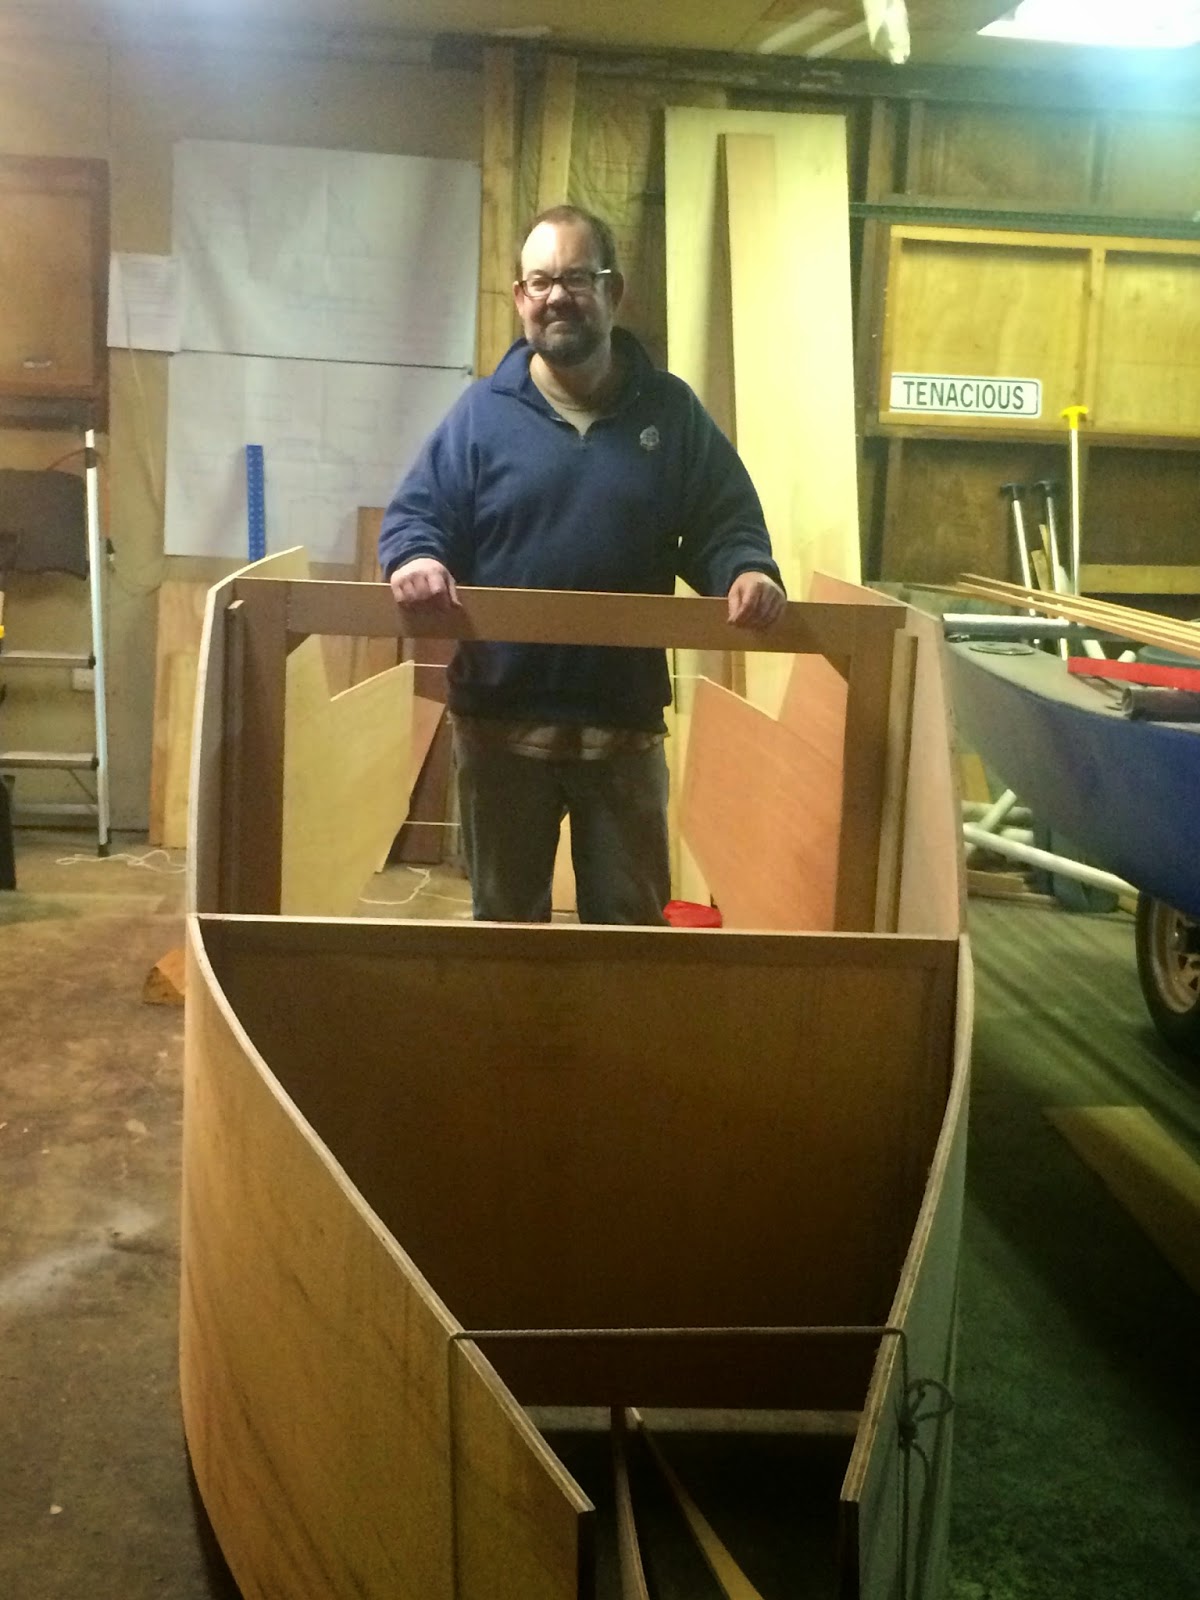
So the day finally came to assemble the sides and bulkheads and see how everything fit. This is my first boat build, But I'm sure it's one of the red letter days for anyone building boats. It's the day yu can see the real shape of what you're building for the first time.
I started with the temporary mold
It stands up by itself! First sense of real proportion. Next item wast the forward cabin bulkhead #5. This was the first place i saw a bit of a problem. Jim specifies a 20 degree side bevel at this bulk head, and i know things turn pretty sharply for the bow, but it seemed like a lot. Turns out it was. O sucked the bow together with a rope, but this gap was still present.
I started with the temporary mold
It stands up by itself! First sense of real proportion. Next item wast the forward cabin bulkhead #5. This was the first place i saw a bit of a problem. Jim specifies a 20 degree side bevel at this bulk head, and i know things turn pretty sharply for the bow, but it seemed like a lot. Turns out it was. O sucked the bow together with a rope, but this gap was still present.
I'm thinking maybe the stem and "2 bulkhead in from of it will suck it in, so I installed those next. I did the stem first to avoid any side to side racking. then I tapped #2 into place. They fit extremely well.
Unfortunately the gap at #5 was still present. Ah well, off to the transom. I figured I'd lock that in first because the pressure sure helps hold things when putting in intermediate bulkheads. This is where I noticed another problem. I'd already reversed the bottom bevel on the transom, and recutting it the right direction made it 3/4" to short. I figured i'd just laminate some more timber on top to bring it to height. I'd already sistered the bottom lumber to get some meat back for the bottom pintle and the bottom screws. Turns out i completely missed the fact that this is the one "frame" that has double thick lumber. I caught it on laying out the sides. the line was there for the from face of the transom edge. That's what tipped me off when i went to install the transom :-) Ah well again. it was the right width with the right side bevels, so I installed it as a "temporary" form. I then went on and installed bulkhead # 12, which came out beautiful.
Back to the problem of bulkhead # 5. I broke out my handy little protractor, and sure enough the proper bevel is 10 degrees. Fixing the bevel was going to slight narrow the bulk head. It's designed at 40" wide. The curve of the sides seemed to turn pretty had at this bulkhead anyway, and smoothing the curve a bit appealed to me. not to mention to economy of time and material. It was a quick fix to change the bevel and see where i ended up, so i tried it.
Perfect. I'm now 3/4" narrower than designed at bulkhead #5, or 2%. I can live with that. The sides look nice and fair. I took my diagonals and I'm @ 3/16" off measuring stem to each corner of the transom. On inspecting the stem closely, i see I have one side @ 1/8" higher than the other throwing a slight twist into the boat. Easy to fix on final assembly. Here's how it all looks put together.
And I'm a happy camper :-)
So over the next week i'll pull it back apart, cut out the notches and access openings in the bulkheads and build a new transom. Hopefully next weekend i glue and screw the whole thing together permanently. I'm going back and forth on whether to frame out the cabin before flipping it for the bottom or doing the bottom first. the extra framing would be nice for strength while flipping and living upside down. Then again having the bottom on would have the whole thing in rigid alignment for that frame out. I'd just want to get the bottom epoxied while upside down, and i'm not sure if i'll have the temperatures for that or get delayed. Decisions :-)
Here's some video of a walk around after assembly.
Subscribe to:
Posts (Atom)